

How to harvest autoflower cannabis
Improper harvesting of cannabis can be a costly mistake, especially following months of preparation and dedicated work. To ensure good yields and potent bud, you must consider the key aspects of cannabis harvesting. Timing and technique are crucial. Learn why flushing before harvesting boosts your yield’s quality. Discover the optimal time to harvest for maximum potency. And master the art of efficiently harvesting your autoflowers for top-quality results.
Before you start harvesting your plants
The first step is determining when your plants have reached peak harvest form, which for most growers is when the buds are at their most potent. If your plants are ripe and ready for harvesting, you will notice that most pistils have changed color, the plants have stopped producing crystals and resin, the fan leaves have begun to yellow and droop, and bud mass and scent have peaked. Because various plant varieties can ripen anywhere from 45 to 70 days, these indicators might not appear on all your plants.
Why you should flush before harvesting
Pre-harvest flushing is a technique that involves feeding your cannabis plants with plain ph adjusted water and no nutrients before harvesting to rid the plant of any residual nutrients. By inducing a state of nutrient scarcity, pre-harvest flushing forces the plants to consume their stored nutrients, reducing harshness and getting rid of the excess chlorophyll.
When to harvest autoflowers
Getting the timing right in harvesting autoflowers can be tricky. Here are some simple and effective ways to check when buds are ripe:
Look at the Pistils: These white hairs turn darker as the plant matures. Once 60-70% of them have darkened, it is usually a good signal your autoflower cannabis plant is ready for harvest.
Examine Resin Glands or Trichomes: Using a magnifying glass or microscope, you can check this. When trichomes shift from clear to cloudy white, the buds are ready for harvest.
Check Leaf Color: Aging autoflower cannabis plants experience “fall colors” in their leaves, changing from green to purple, yellow, or red. This discoloration is a good indicator that it’s time to harvest.
Should you put autoflowers in the dark before harvesting?
Yes. During harvest, putting your autoflower cannabis plants in a dark environment for a couple of days is thought by some growers to give them one final boost. This agricultural trick is known to spike the resin production in your plant, increasing the potency.
To do this make sure your plants are in total darkness, with no light leaks. If you have a tent, make sure it is completely closed and the lights in the room are shut off. Put a blocker like a towel or wedge at the bottom of your door to prevent light from leaking into the room. Aim for about 48 continuous hours of darkness before cutting them for drying and curing them. This will give your plant ample time to maximize resin production.
Defoliation prior to harvesting?
This process is also known as de-fanning. The purpose of it is to increase air circulation and light penetration within the plant, thereby helping the buds develop better. It also concentrates the plant’s energy to focus on producing flowers instead of leaves that may be discarded after harvest.
Defoliation can also reduce the chances of mold and fungus growth during the final flowering phase by reducing the overall humidity around the buds, especially in a dense canopy. This should be done tactfully. Only the large fan leaves obstructing the buds should be removed. Excessive or improper defoliation can stress the plant, especially with autoflowers, so be mindful about when and how many leaves you remove. A good rule of thumb is just taking off 15%-20% of the leaves at a time.
How to harvest autoflowers step-by-step
Step 1: Cutting down your autoflowers
The first step is to cut down each plant. Be careful not to damage any of the buds when doing this. There are two ways to do this, and it really depends on the size of the plant. With autoflowers given their small size it’s easier to first remove any trellising or ScrOG nets and then cut right at base of the plant to remove the plant all in one go. Once you have done this you can easily take the plant to an area with more space and begin cutting off the main branches ready for trimming.
Step 2: Trimming your buds
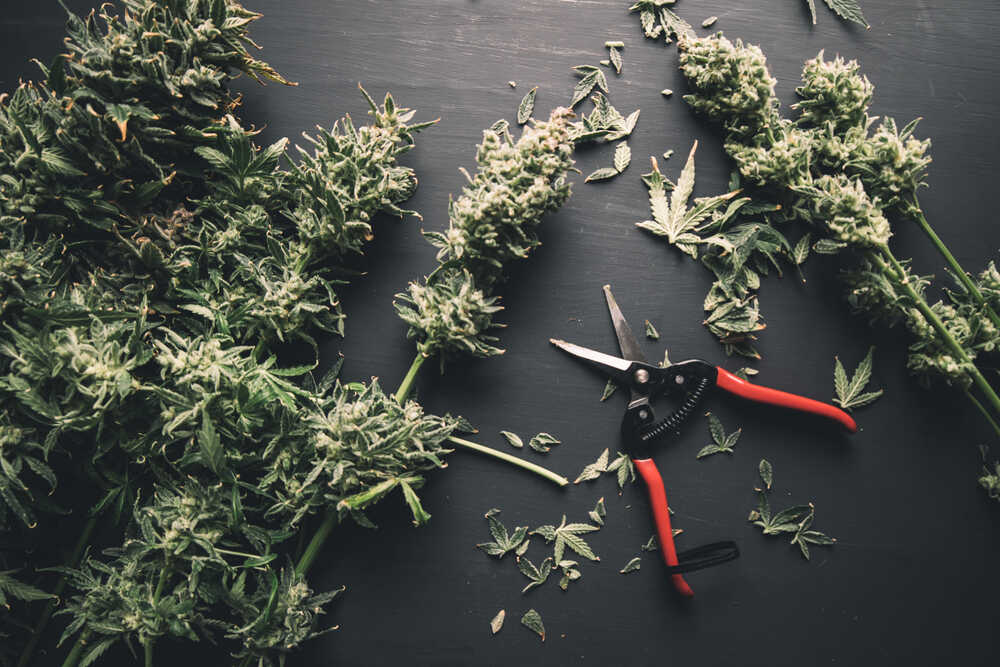
There are two methods of trimming, wet and dry. The choice is up to you, but some argue that dry trim methods damage and eliminate trichome development on buds but lead to faster harvesting times. Wet trimming processes preserve and protect trichomes but result in prolonged completion times. Trimming your buds is crucial to refine their quality, potency, and aesthetics. Start by removing more significant sugar and fan leaves by cutting them at the base. Then, focus on the smaller leaves close to the buds, follow their stems, and cut them. A pair of sharp trimmers can be handy here. Consider clean, wet trimming first because it’s less messy and lets you remove leaves before they shrivel and harden around the bud.
Step 3: Drying your buds

The fundamental purpose of drying flowers is to prevent microbial growth by slowly removing excess moisture from freshly harvested cannabis plants while also providing a controlled environment ideal for chemical reactions within the plant to occur that are essential for producing higher terpene and flavonoid development with a stronger potency and more desirable aromas. Proper drying of your buds is crucial to maintain their potency and prevent mold. For this, an ideal temperature range of 60-70°F (15-21°C) and a relative humidity of 45-55% is ideal. Choose a cool, dark, and well-ventilated space. Hang your buds upside down from strings or put them on drying racks. Check them daily for mold and rotate the buds on the rack for even drying. Drying usually takes between 7-14 days.
When drying your harvested cannabis aim for a balance where the buds aren’t too wet or too dry; too much moisture encourages harmful microorganisms like bacteria and molds, while overly dry conditions can lead to the loss of terpenes, which give your cannabis its unique aroma and flavor. Control the drying environment’s temperature for additional safety, and remember that while pH levels also affect microbial growth, they’re harder to adjust post-harvest. The goal is to reduce water activity to a level that inhibits mold without sacrificing the terpenes, ensuring both the safety and quality of your cannabis.
Step 4: Curing your bud
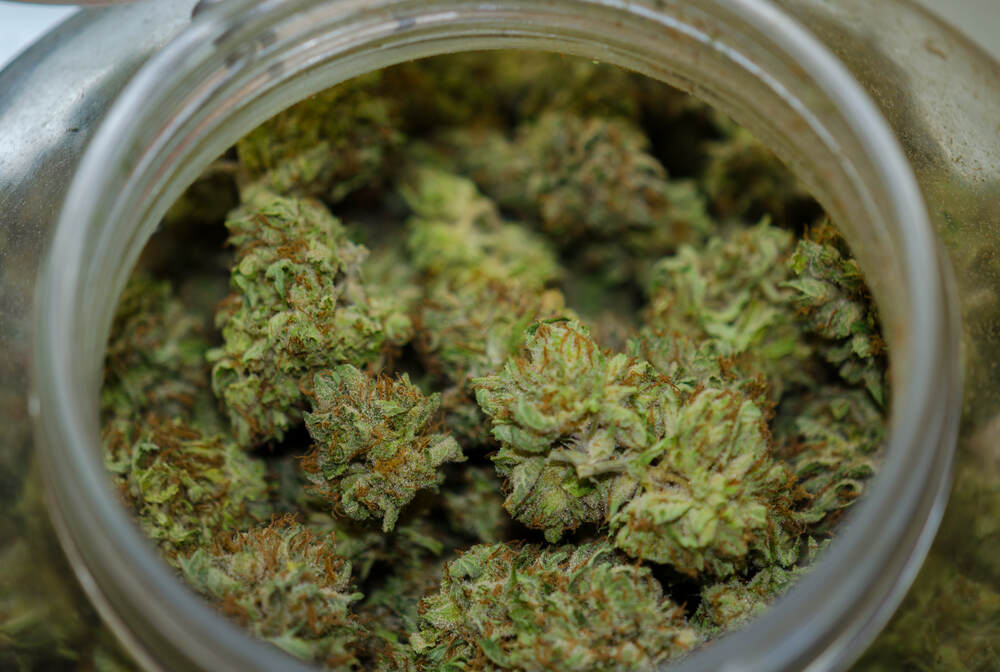
Once the buds are dry, it’s time for curing. This is a process that is designed to maximize the potency and preserve the flavor and aroma of your bud. To start place them in glass jars, fill them about ¾ full to allow for air exchange. The ideal temperature is about 70°F (21°C), and the ideal relative humidity is around 60-65%. Keep the jars in a cool, dark place.
During the initial days, open (burp) the jars daily for 10 to 15 minutes to refresh air and check for mold. After a couple of weeks, you can reduce burping frequency. Curing generally takes about 2-4 weeks, but some prefer to cure even up to 4-8 weeks for better quality. Avoid exposing cured buds to heat, light, and air as this can reduce their quality.
Wet trimming vs dry trimming your buds
Wet Trimming:
Wet trimming refers to the process of trimming your cannabis buds immediately after you cut them down while they are still wet. This is the preferred method for its ease compared to dry trimming, as freshly cut leaves are more manageable. It also reduces the risk of mold, especially in humid climates, and speeds up the drying process. Flash drying will lead to a harsher smoke and a less pronounced smell. You must also be extra careful to avoid aggressively handling or squashing trichomes.
Dry Trimming:
Dry trimming is when you trim the buds after you’ve let them dry for about a week. This method helps preserve the aroma and flavor of buds by allowing the drying process to occur slowly, which is ideal for arid climates. Trichomes on dried buds are less sticky and fragile, lessening the chance of them getting damaged during handling.
The downside is that leaves can become brittle when dry, making this method slightly more challenging than wet trimming. There’s a risk of mold if not dried properly, especially in humid settings. You must pay attention during the drying phase before trimming.
What is a perpetual harvest?
A perpetual harvest is a continuous cycle of planting and harvesting, ensuring that you always have autoflowers on the go but at different growth stages of their lives. This process ensures at least one batch of plants is always ready for harvest every few weeks.
While one batch of autoflower cannabis plants is flowering, another set is in the vegetative stage, and a new set of seedlings is just beginning to grow. Once you harvest the flowering batch, the vegetative plants move to the flowering phase, and the seedlings progress to the vegetative stage. You then add a new set of seedlings. This cycle continues perpetually.
Perpetual harvesting is great if you are a commercial grower as it allows you to maximize your output over time without waiting for a whole crop to mature, harvest, and cure before starting the next one.
What is a partial or staggered harvest?
Partial or staggered harvest refers to harvesting buds at different stages of their ripeness rather than cutting down the entire autoflower cannabis plant at once. This method takes advantage of the fact that buds do not mature simultaneously. Generally, buds at the top of the plant, exposed to more light, ripen first, while the lower parts grow more slowly.
On the first harvest round, you selectively pick the ripe buds, leaving the immature buds to continue developing. After a stipulated time, usually a week or two, you then revisit the plant, cutting the buds that are now ripe.
Staggered harvesting is beneficial in two ways: it optimizes the potential of each bud, allowing you to harvest them at their peak of potency and flavor, and it can provide a diverse experience for the consumer. Buds harvested earlier might have a different cannabinoid and terpene profile than those harvested later, offering distinct effects and flavors.
Apply these expert tips to your next Autoflower seed grow and harvest big yields of high-quality buds! Appreciate our advice or find it helpful? Spread the knowledge. Don’t forget to like and share this article with your fellow growers. Happy harvesting!


